I can’t even remember where it came from, but suddenly, shortly before my summer holidays in September 2020, I just felt like I wanted to give knitting another try. Third time’s the charm or something. My knitting history is all but great: Back in primary school, my tensioning was so bad the needles squeaked because it was so tight – not much fun to spend more time than necessary on it. In my teens, I thought it would be great to give it another go and knit a very long scarf. In the end, it was my mum who did it; I gave up hardly 10cm in.
This time, however, I didn’t give up so easily. I had my mum show me once more the basic stitches, went down the knitting tutorial rabbit hole on YouTube, and just started practicing on some abandoned piece of knitting of my mum’s. It was veeeery slow going. Like, sloth slow going. But at some point, I was able to knit and purl, even if it took some (read: a lot of) time.
When I found a very cheap book on knitting patterns and some orange yarn at our local thrift shop, I was all set to design and knit my very first sweater! I started drawing up a very simple pattern. I basically only decided what types of stitches to use and how many rows to knit in each type to end up with enough centimetres for something vaguely sweater-looking. Increasing and decreasing rows for a better fit? Who would do such a reasonable thing anyway?!

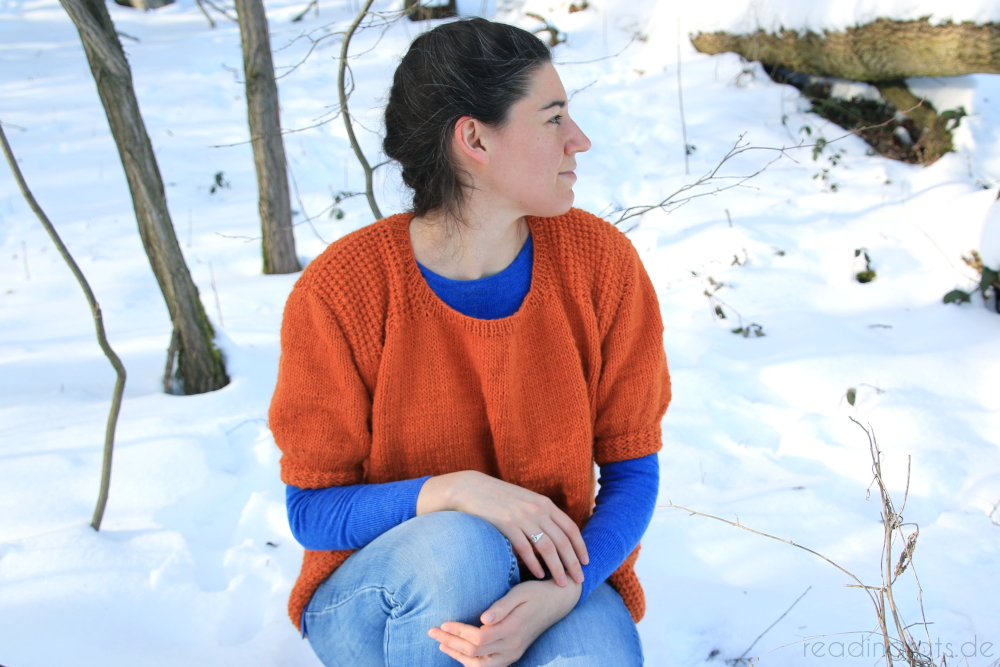
And so I began – after I extensively practiced the fancy stitch, of course! Perfectionist and someone who needs to practice patterns of alternating stitches as long as it takes for the muscle memory to take over at work here. I think in the beginning, it took me about half an hour per row, but I kept going and with each row, I got a little faster, a little steadier. The knitting travelled to the North Sea and back to Bamberg and I knitted the front and I knitted the back, figuring out how to read and catch stitches and finish off the neckline on the way. It wasn’t always looking particularly pretty, but it was going somewhere. And then I put it on hold for the longest time because I decided I wanted to do a real sweater, one with nice yarn (this one, while being an amazing colour, is unfortunately 50% acrylic) and working off of a pattern. When that didn’t turn out quite as planned (that’s a different story, though), I came back to this one and decided to finally finish it.
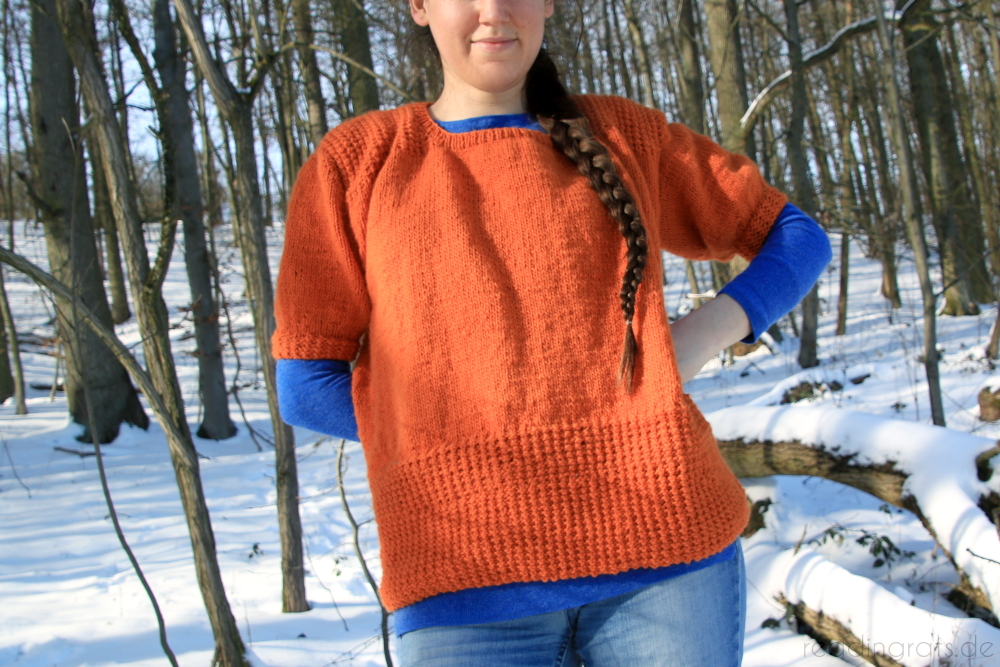
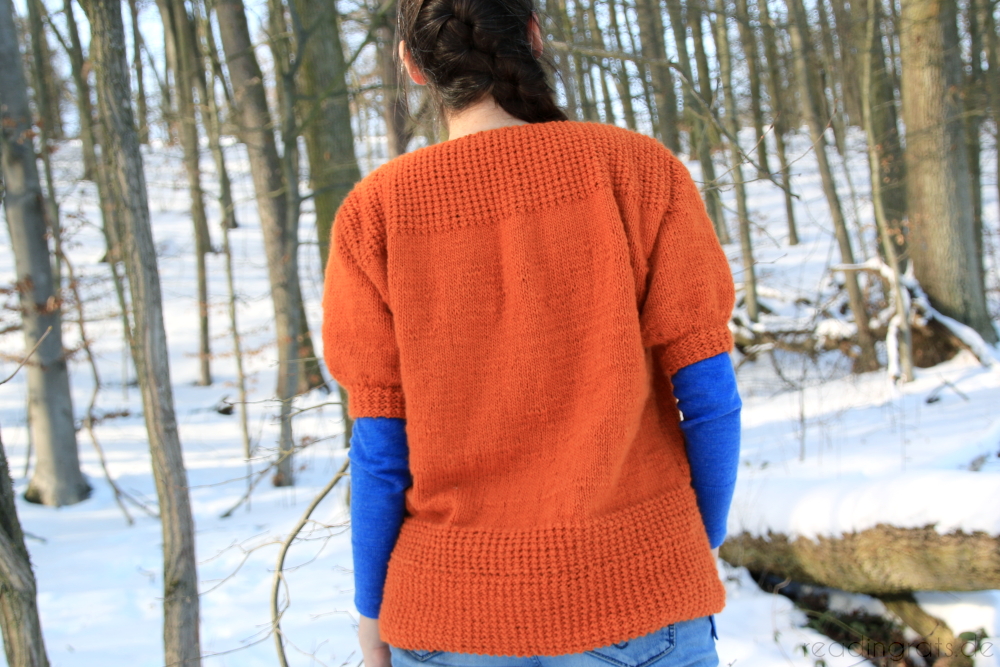
I already had the front and the back pieces, so it was time to put them together. I used a mattress stitch, which works like magic if done right but it is also really confusing and I’m not sure I’ve figured it out yet. Still, I ended up with a big rectangle of knitwear. Next up: the neckline, which I did over and over and over again. First, I had to figure out how to evenly pick up stitches without leaving any holes, then I used the wrong needle size, and as it goes with ribbing, I made a mistake and had to painstakingly fix it. Ribbing – the bane of my knitting existence. The result doesn’t look quite like I had imagined, but it’s alright.
The arms, though. I had planned to add full-length sleeves but I was pretty sure I would be running out of yarn way before I finished the second one (looking back, maybe it would have been enough. I will never know, but at least I put the remaining yarn to good use). So, short sleeves it was. And because plain and simple is not in my vocabulary when it comes to crafts even if I have no idea what I’m doing, I wanted them to be seamless, and bell shaped, and have a ribbing from the fancy stitch I used on the body. And I just winged it! Not completely without a plan, though: I found Tasha’s wonderful in-depth tutorial on how to knit seamless sleeves. I just happily ignored it half of the time. How I still somehow managed to coax proper and quite nice looking sleeves out of my yarn and needles is above me!
And since I had so much yarn left from shortening the sleeves, I decided to add more length to the sweater – knitting in rounds top down, which is why it does have a weird looking break in the middle because the stitch pattern is facing up for the part I knitted before and down for the part I added. I decided I could live with that. Last step: finishing off all those loose ends (always such a nuisance) – aaaaand done!
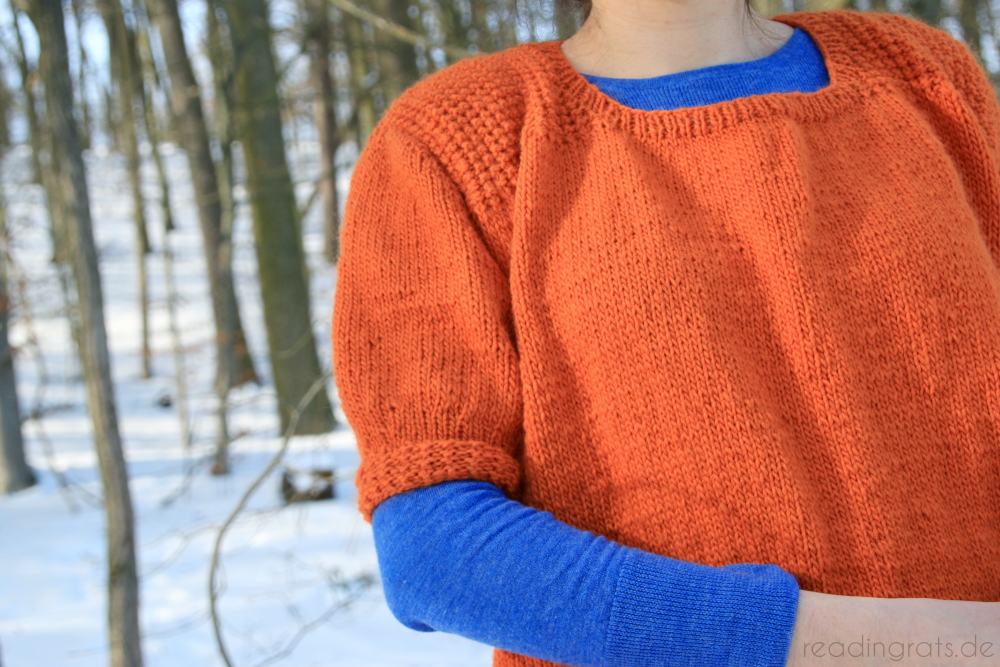
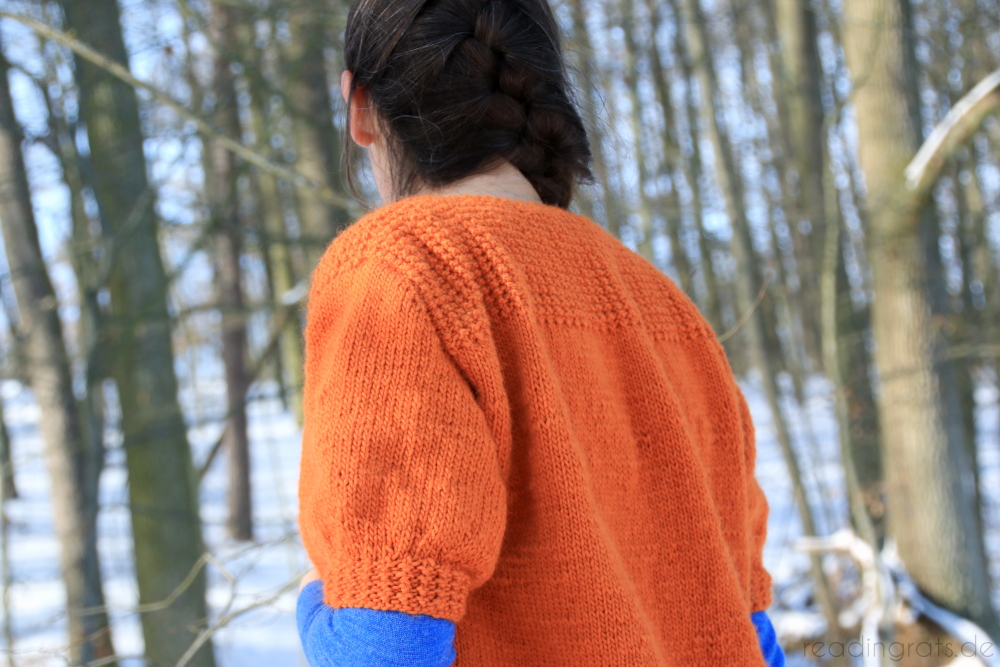
I’m quite proud of how it turned out. It’s far from perfect, it’s not how I imagined it, but it’s a finished piece of knitwear I’m able to wear (and already did – not just for this photo shoot – paired with this light and gorgeously blue sweater. I love complimentary colour blocking and orange and blue are my favourites).
This project taught me so much: knitting and purling, knitting into the back, binding off, picking up, seamless sleeves (though I will have to reference that tutorial, that’s not something I will remember from just doing it twice), magic loop – and patience. Lots and lots of patience. With sewing, my impatience often overrides all reason at some point and I take shortcuts which I know I might regret later on and most often do. With knitting, I just go the extra mile and unravel or use different techniques to fix my mistakes. Not all of them, and the ones I leave in there will probably haunt me forever, but most. So knitting has an unexpected positive effect on me. Ready to tackle lots of future projects!